5 Techniques for Using Piecrust - Bake from Scratch
Whether you choose single servings or larger slabs, you can bake any variety of pie using our dependable All-Butter Piecrust.
Perfecting Your Piecrust
The secret to achieving flakiness in the All-Butter Piecrust lies in minimizing mixing after incorporating the butter to ensure small, intact pieces of butter are evenly distributed throughout the dough. As the butter melts in the oven, it releases moisture that transforms into steam. This extremely hot steam causes the dough layers to puff up and separate. Using cold ingredients and handling the dough as little as possible are essential for creating the best crust, so it’s crucial to be meticulous in preparing your dough for baking.
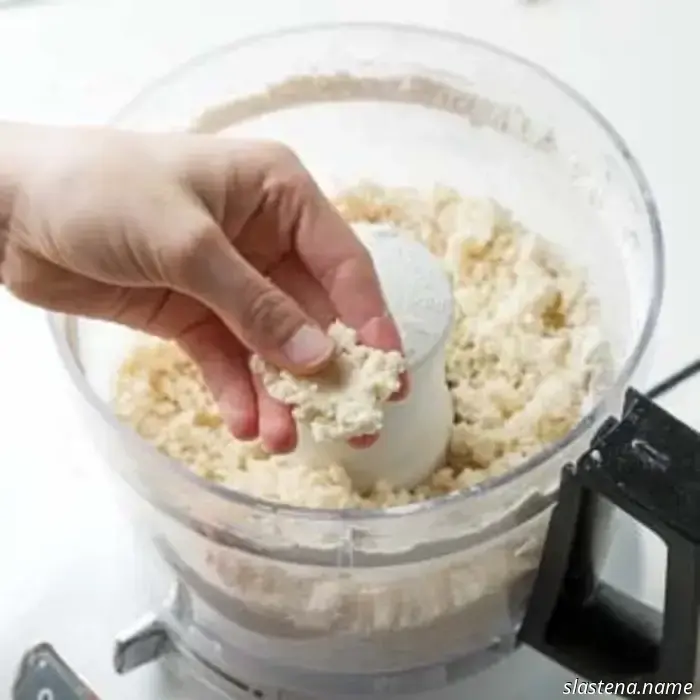
Using a food processor for making piecrust is the most effective approach. It is quicker than mixing by hand and helps keep the ingredients colder, resulting in a flakier crust. Once the mixing is done, the dough will appear crumbly but should feel moist and hold together when squeezed—not sticky.
Utilize a long rolling pin to roll out the chilled dough from the center outward, applying firm (but not excessive) and steady pressure. Avoid pressing down on the edges to prevent them from becoming too thin. Rotate the dough a quarter turn and roll again. Lightly flour underneath as needed to avoid sticking. If the dough becomes overly soft or warm, chill it for 5 to 10 minutes before continuing. Keep rolling and turning until the dough is large enough to extend 1 to 2 inches beyond the pie plate. For a 9-inch pie plate, roll the dough into a 12-inch circle.
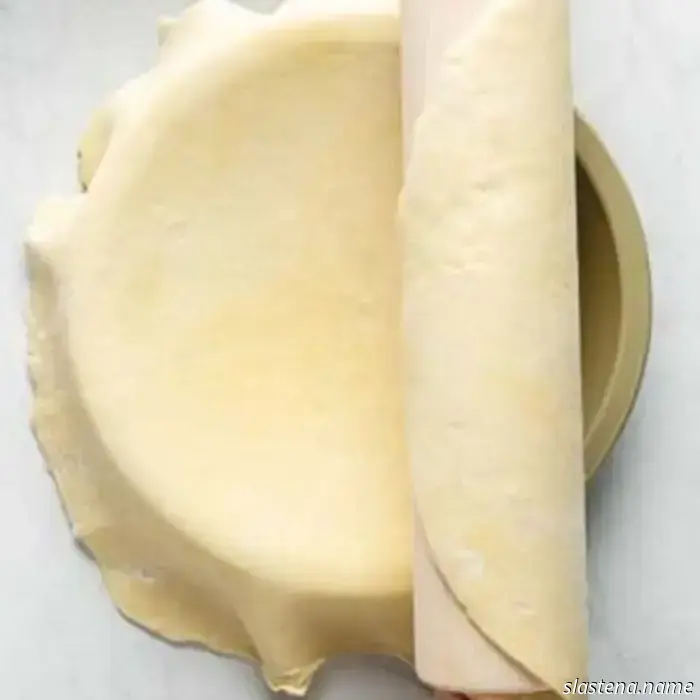
To move the dough to the pie plate, position the rolling pin about 2 inches from the top of the rolled dough. Fold the top edge of the dough over the rolling pin and make one complete turn to loosely wrap the dough around it. Lift the pin and gently place it in the center of the plate, then unfold the dough.
Allow the dough to fall into the plate as you gradually unroll it off the pin. Carefully lift the edges and let it hang down the sides and into the bottom of the plate.
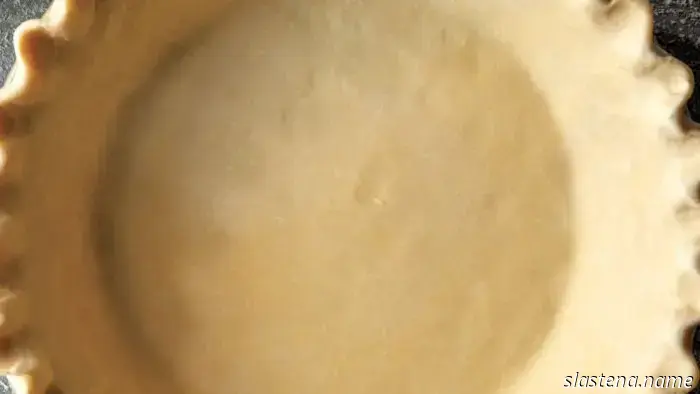
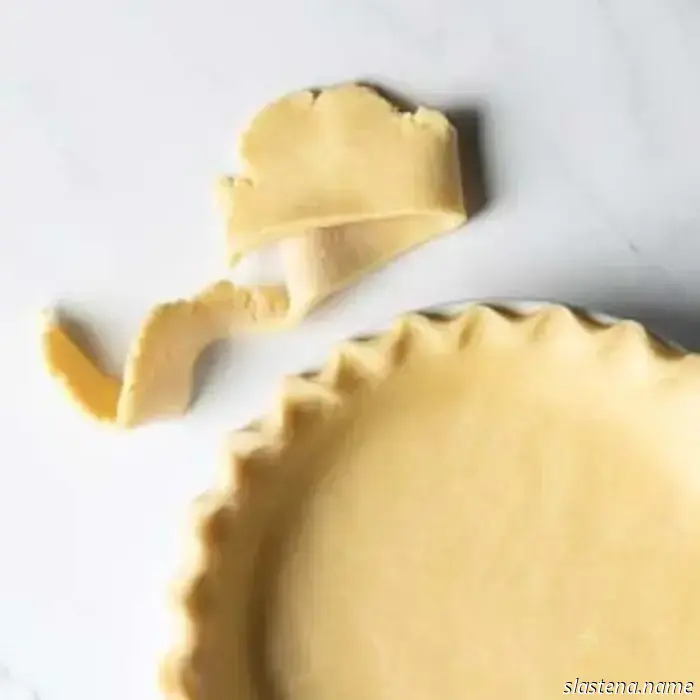
Press the dough into place gently. Be careful not to stretch it, as it will shrink back while baking. Trim any excess dough to between ½ to 1 inch beyond the edge of the plate, then fold the edges under and crimp as desired.
Save those trimmings!
Don’t throw away your piecrust scraps! Sprinkle dried herbs and cheese, or sugar and spices on them, and bake until golden brown for a tasty treat. Alternatively, you can freeze the trimmings in a sturdy resealable bag until you have enough to make a full crust.
Other articles
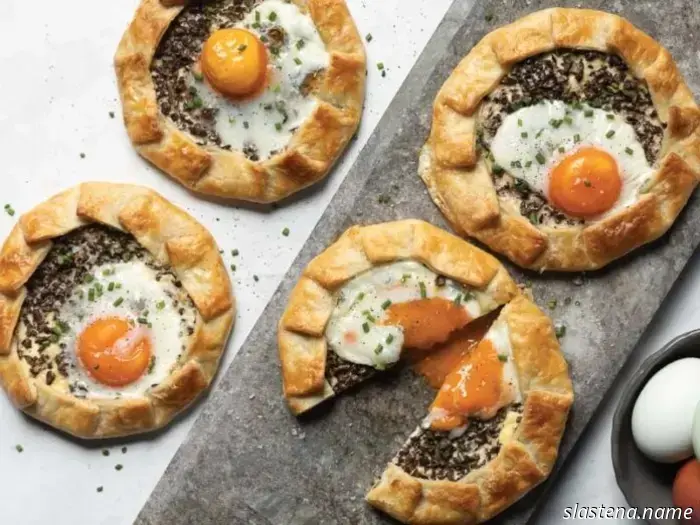 Egg and Mushroom Galettes - Bake from Scratch
These tasty Egg-and-Mushroom Galettes are packed with duxelles, which is a French word for a paste or finely minced blend of mushrooms seasoned with alliums and herbs.
Egg and Mushroom Galettes - Bake from Scratch
These tasty Egg-and-Mushroom Galettes are packed with duxelles, which is a French word for a paste or finely minced blend of mushrooms seasoned with alliums and herbs.
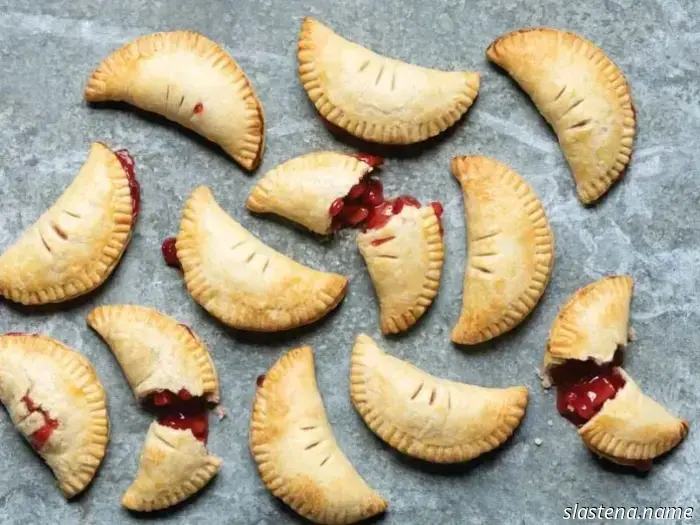 Strawberry-Plum Hand Pies - Recipe from Bake from Scratch
Incorporating lemon juice into the fruit fillings enhances the sweetness balance and enriches the flavors of these Strawberry-Plum Hand Pies.
Strawberry-Plum Hand Pies - Recipe from Bake from Scratch
Incorporating lemon juice into the fruit fillings enhances the sweetness balance and enriches the flavors of these Strawberry-Plum Hand Pies.
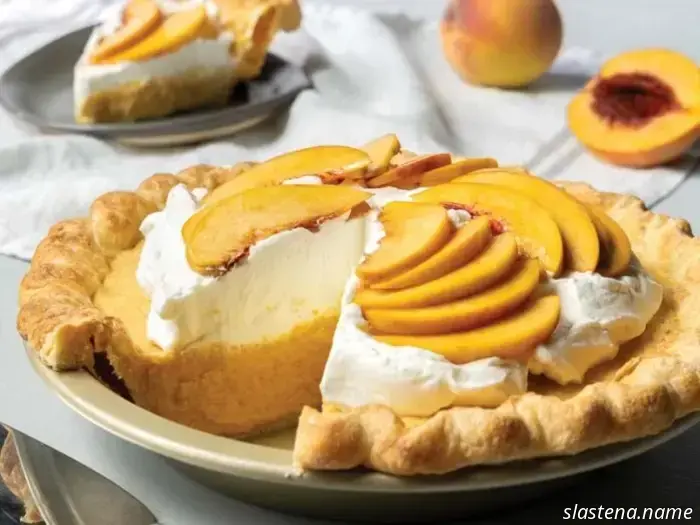 Peach and Cream Pie - Bake from Scratch
With its flaky crust layers, creamy filling, whipped cream, and rosy fruit, you'll want this refreshing Peaches and Cream Pie throughout the entire season.
Peach and Cream Pie - Bake from Scratch
With its flaky crust layers, creamy filling, whipped cream, and rosy fruit, you'll want this refreshing Peaches and Cream Pie throughout the entire season.
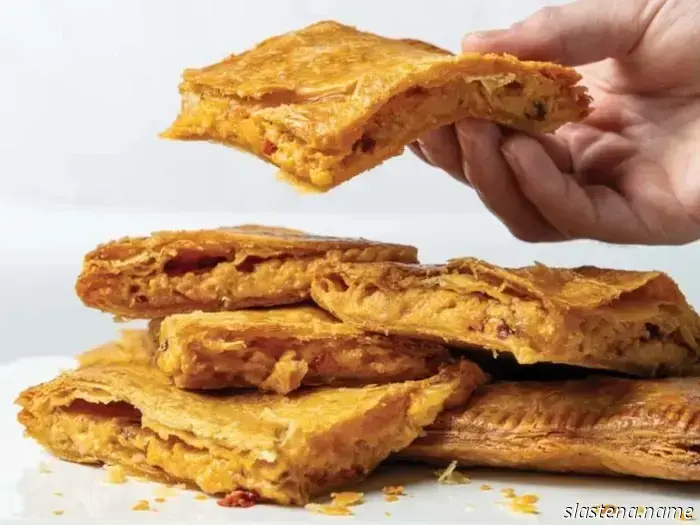 Pimiento Cheese Slab Pie - A Recipe from Bake from Scratch
Enjoy a slice of this Pimiento Cheese Slab Pie as a tasty snack or a light lunch.
Pimiento Cheese Slab Pie - A Recipe from Bake from Scratch
Enjoy a slice of this Pimiento Cheese Slab Pie as a tasty snack or a light lunch.
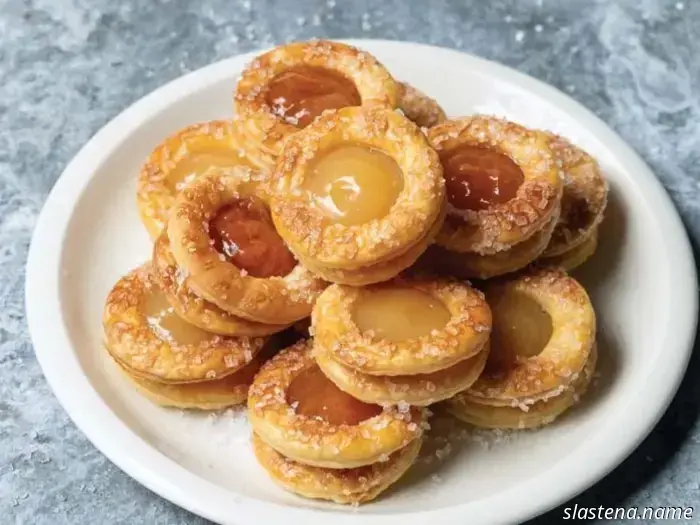 Linzers with Piecrust - Bake from Scratch
Traditionally, Linzer cookies are prepared using a shortbread-like dough. We've elevated them by using pie crust instead.
Linzers with Piecrust - Bake from Scratch
Traditionally, Linzer cookies are prepared using a shortbread-like dough. We've elevated them by using pie crust instead.
5 Techniques for Using Piecrust - Bake from Scratch
Whether you're making single servings or large slabs, you can bake any type of pie using our reliable All-Butter Piecrust.